



Django Tutorial
11강. Static 설정 및 CSS 파일 분리

학습 목표 : Static한 파일들을 관리하기 위한 세팅 작업, 그리고 CSS 파일을 분리해내는 작업을 배워본다.
Static
•
“자주 변경되지 않는” 속성 혹은 파일들
•
Static 한 프로젝트 혹은 앱은 프로젝트별로, 앱별로 따로 관리한다.
1) pragmatic_2/pragmatic/settings.py
STATIC_ROOT = os.path.join(BASE_DIR, 'staticfiles')
# 특정 앱에 종속되지 않는 static 폴더를 따로 만들어야 한다. (Django 문서 참고)
STATICFILES_DIR = [
BASE_DIR / "static",
]
# 이후 pragmatic 파일 내부에 static 파일(디렉토리)를 새로 만든다. (스태틱 파일들을 관리)
Python
복사
•
STATIC_ROOT = os.path.join(BASE_DIR, ‘staticfiles’)
◦
STATIC_ROOT : 프로젝트 안에 있는 모든 static 파일들을 한 곳으로 모아 놓는데, 이 때 어디로 모일 것인지 알려주는 역할
◦
os : 라이브러리 (즉, os에서 제공하는 함수 및 모듈들)
◦
path : 경로 관련 모듈
◦
join : 병합
◦
(BASE_DIR, ‘staticfiles’) : base 디렉토리 상단 staticfiles라는 곳에 static 파일들을 모아 놓음
2) pragmatic_2/pragmatic/templates/head.html
<!-- static 파일을 불러오기 위해 맨 위에 작성한다. -->
{% load static %}
<head>
<!-- DEFAULT CSS LINK 작성 -->
<link rel="stylesheet" type="text/css" href="{% static 'base.css' %}">
</head>
HTML
복사
3) pragmatic_2/pragmatic/static/base.css
.pragmatic_logo{
font-family: 'Black Han Sans', sans-serif;
}
.pragmatic_footer_button{
font-size: .6rem;
}
.pragmatic_footer{
text-align: center; margin-top: 2rem;
}
.pragmatic_header{
text-align: center; margin: 2rem 0;
}
CSS
복사
4) pragmatic_2/pragmatic/templates/header.html
<div class="pragmatic_header">
<div>
<h1 class="pragmatic_logo">Pragmatic</h1>
</div>
<div>
<span>nav1</span>
<span>nav2</span>
<span>nav3</span>
<span>nav4</span>
</div>
</div>
HTML
복사
5) pragmatic_2/pragmatic/templates/footer.html
<div class="pragmatic_footer">
<div class="pragmatic_footer_button">
<span>공지사항</span> |
<span>제휴문의</span> |
<span>서비스 소개</span>
</div>
<div style="margin-top: 1rem;">
<h6 class="pragmatic_logo">Pragmatic</h6>
</div>
</div>
HTML
복사
12강. CSS 간단 핵심
학습 목표 : CSS에서 핵심을 짚고 넘어간다. 특히 디자인 레이아웃에 있어서 핵심적인 display 속성 block, inline, inline-block, none 및 size 단위 px, em, rem, %의 차이를 알아본다.
CSS(Cascading Style Sheet)의 속성 : tag 내에 attribute 형태로 작성되어 사용됨
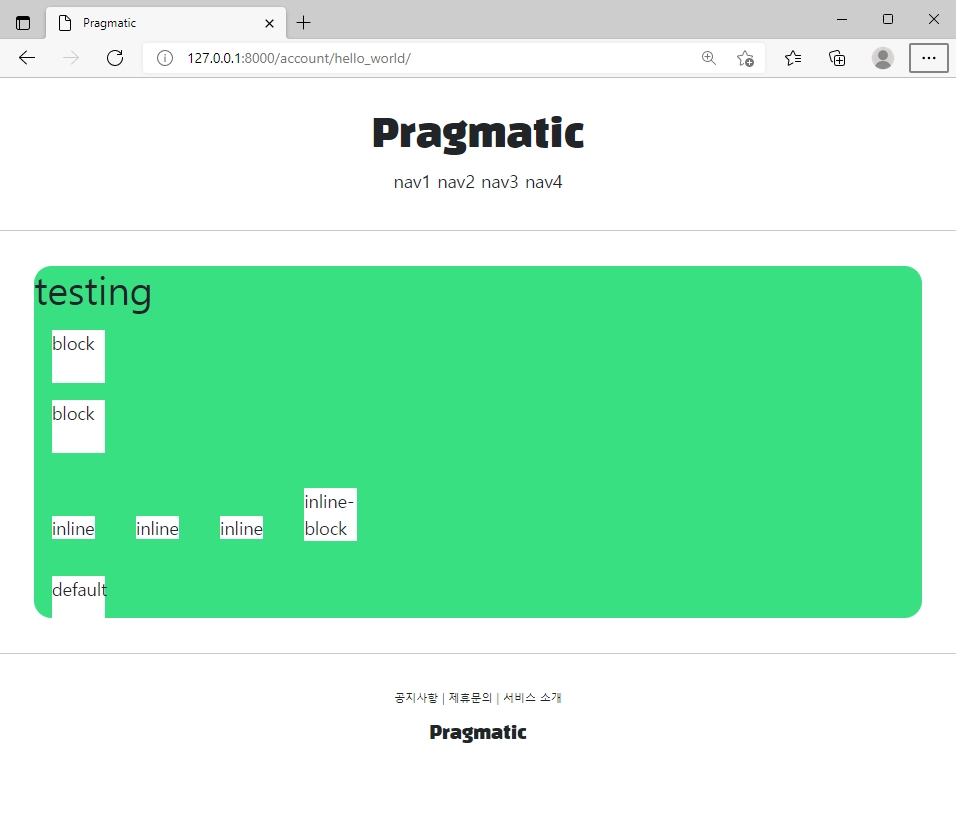
1) Display
•
Block
◦
부모의 최대 너비를 자식의 너비로 가져가면서, 블록 모양의 형태를 가진다.
◦
높이는 디폴트 값으로 설정된다.
◦
여러 개의 Block은 아래로 쌓인다.
•
Inline
◦
작성된 글씨의 높이만큼 설정된다.
◦
여러 개의 Inline은 옆으로 쌓인다.
•
Inline-block
◦
블록이지만, Inline과 마찬가지로 오른쪽으로 쌓이는 블록이다.
•
None
◦
HTML 태그 상에 존재는 하지만, 브라우저 상에는 존재하지 않는다.
◦
Visibility의 Hidden 속성과 다르다. (브라우저 상에 존재는 하지만, 보이지 않을 뿐)
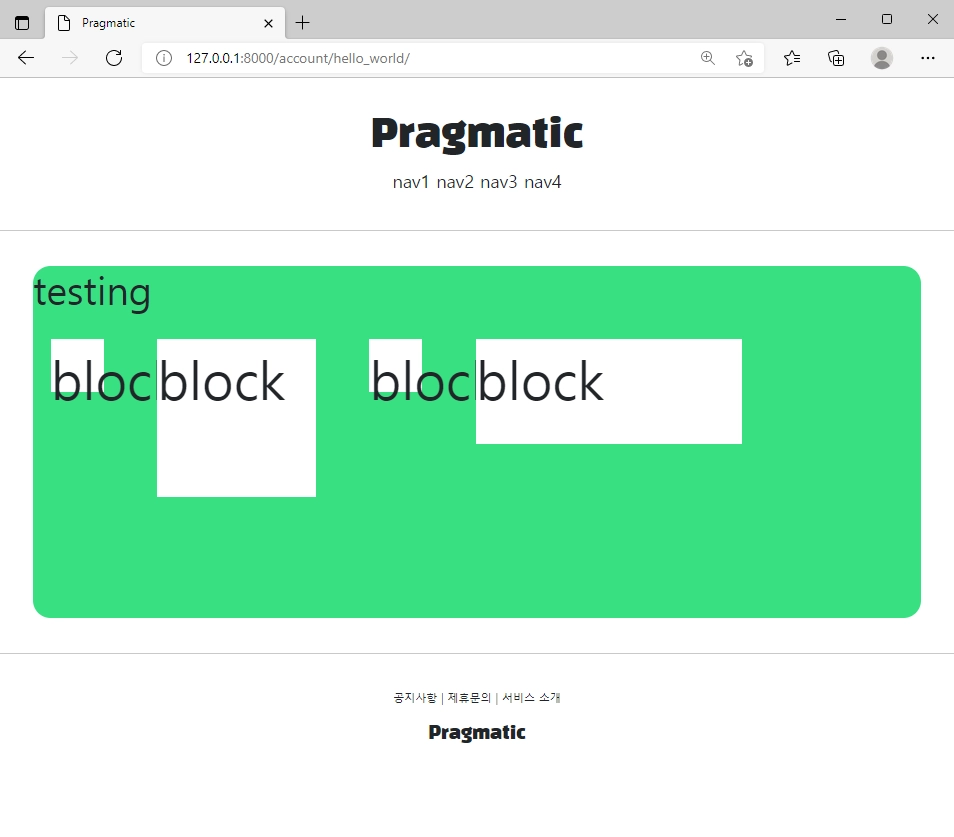
2) Size
※ Font-size와 연관이 있다.
※ 크기를 신경 쓰는 이유는, 만들고자 하는 사이트가 ‘반응형(Responsive)’이어야 하기 때문이다!
•
px
◦
부모의 크기와 변경에 상관 없이, 자식은 고정되어 있다.
•
em
◦
부모가 커지면 자식의 폰트도 비례하여 커진다. (작아지는 것도 동일)
◦
다만, 부모가 여러 개일 때 제곱 하여 커지는 문제가 발생한다.
•
rem ★
◦
가장 많이 사용된다.
◦
root HTML에 기본적으로 적용된 폰트 사이즈에 anchoring 되어 있다.
◦
부모와 상관 없이, root HTML에 비례하여 영향을 받는다.
•
% ★
◦
바로 위의 부모에만 영향을 받는다.
13강. CSS display 속성, rem 단위 실습
학습 목표 : display 속성, html 크기 단위들에 대한 실습을 진행한다.
1) Display Attributes
{% extends "base.html" %}
{% block content %}
<style>
.testing {
background-color: white;
height: 3rem;
width: 3rem;
margin: 1rem;
}
</style>
<div style="height: 20rem; background-color: #38df81; border-radius: 1rem; margin: 2rem;">
<h1>
testing
</h1>
<div class="testing" style="display : block">block</div>
<div class="testing" style="display : block">block</div>
<div class="testing" style="display : inline">inline</div>
<div class="testing" style="display : inline">inline</div>
<div class="testing" style="display : inline">inline</div>
<div class="testing" style="display : None">None</div>
<div class="testing" style="display : inline-block">inline-block</div>
<div class="testing">default</div>
</div>
{% endblock %}
HTML
복사
2) Size Attributes
{% extends "base.html" %}
{% block content %}
<style>
.testing {
background-color: white;
height: 3rem;
width: 3rem;
margin: 1rem;
}
</style>
<div style="height: 20rem; background-color: #38df81; border-radius: 1rem; margin: 2rem; font-size: 3rem;">
<h1>
testing
</h1>
<div class="testing" style="display : inline-block; width: 48px; height: 48px;">block</div>
<div class="testing" style="display : inline-block; width: 3em; height: 3em;">block</div>
<div class="testing" style="display : inline-block; width: 3rem; height: 3rem;">block</div>
<div class="testing" style="display : inline-block; width: 30%; height: 30%;">block</div>
</div>
{% endblock %}
HTML
복사
14강. Model, DB 연동
학습 목표 : 장고와 DB를 연동 시키는 작업을 makemigrations, migrate 명령어를 통해 실행해 본다.
1) pragmatic_2/pragmatic/accountApp/models.py
from django.db import models
# Create your models here.
class HelloWorld(models.Model):
text = models.CharField(max_length=255, null=False)
Python
복사
•
$ python manage.py makemigrations : models.py의 내용을 DB와 연동 시키는 파이썬 파일로 만들어주는 작업으로, 터미널에 입력한다.
2) pragmatic_2/pragmatic/accountApp/migrations/0001_initial.py 파일이 생성됨
•
DB와 django를 연결 시켜주는 연결 고리 역할
•
생성 이후, 0001_initial.py를 연동 시키기 위한 명령어 $ python manage.py migrate 입력한다.
15강. HTTP 프로토콜 GET, POST
학습 목표 : 서버와 통신하는 HTTP 프로토콜 메서드 중에서도 GET, POST의 내용을 간단하게 이해하고 넘어간다.
Protocol (프로토콜) : user와 server 간 통신 과정에서 사용되는 ‘규약’과 같은 것
•
GET
◦
inquiry
◦
https://주소/?param1=value1
•
POST
◦
create, update
◦
https://주소/post + BODY (body에 post의 데이터를 넣은 후 숨겨서 보냄)
 GET과 POST는 (서버가 원하는) 추가적인 데이터를 포함하는 방식이 다르다.
16강. GET, POST 프로토콜 실습
학습 목표 : HTTP 프로토콜 메서드 GET, POST를 장고 내에서 사용하는 방법을 실습한다.
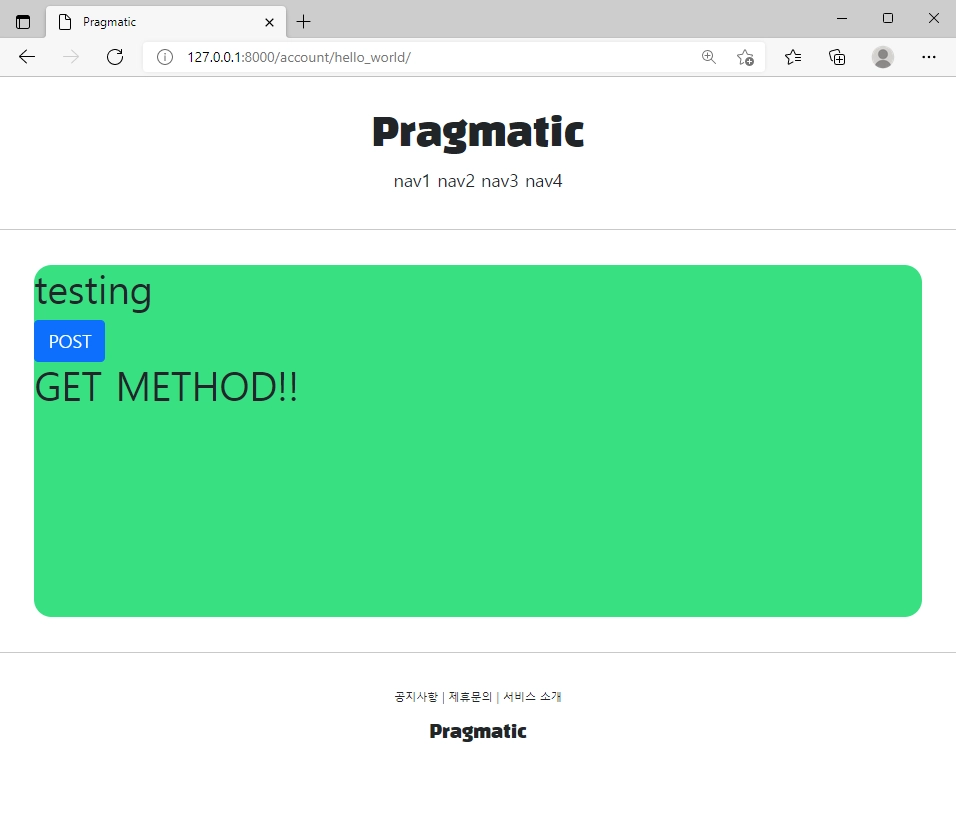
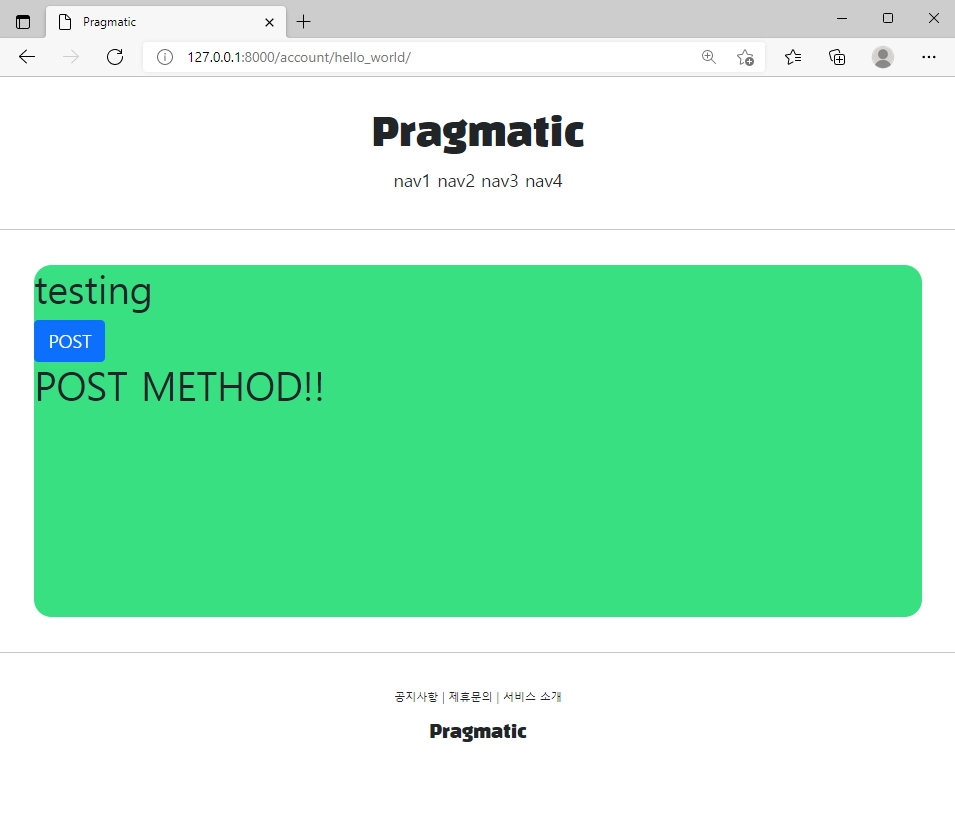
1) pragmatic_2/pragmatic/accountApp/templates/accountAtpp/hello_world.html
{% extends "base.html" %}
{% block content %}
<div style="height: 20rem; background-color: #38df81; border-radius: 1rem; margin: 2rem;">
<h1>
testing
</h1>
<form action="/account/hello_world/" method="post">
{% csrf_token %}
<input type="submit" class="btn btn-primary" value="POST">
</form>
<h1>
{{ text }}
</h1>
</div>
{% endblock %}
HTML
복사
2) pragmatic_2/pragmatic/accountApp/views.py
from django.http import HttpResponse
from django.shortcuts import render
# Create your views here.
def hello_world(request):
if request.method == "POST":
return render(request, 'accountApp/hello_world.html', context={'text': 'POST METHOD!!'})
else:
return render(request, 'accountApp/hello_world.html', context={'text': 'GET METHOD!!'})
Python
복사
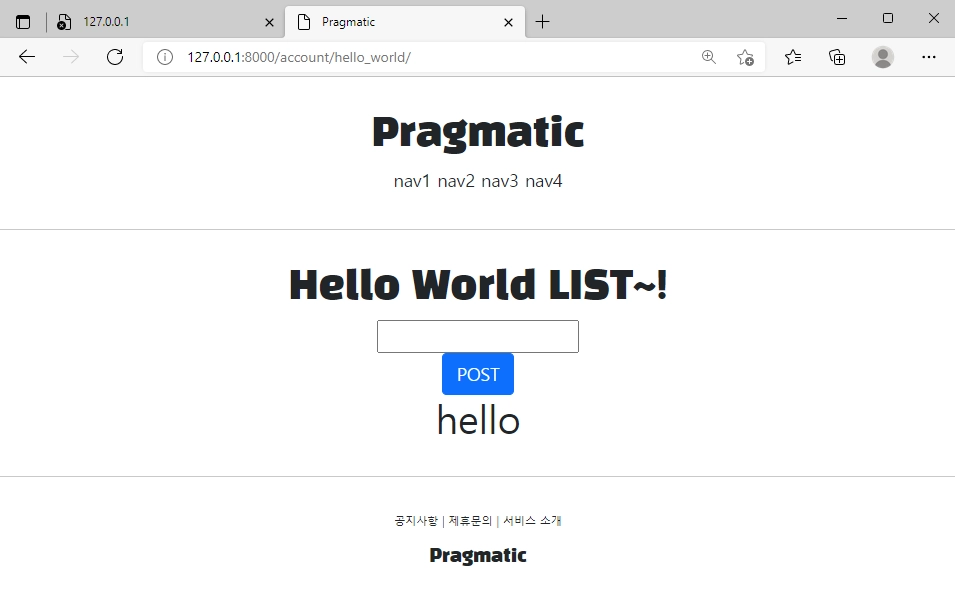
17강. POST 통신을 이용한 DB 데이터 저장 실습
학습 목표 : HTTP 프로토콜 메서드 POST를 통해 서버에 데이터를 보내고, 그 데이터를 DB에 저장하는 방법을 실습한다.
1) pragmatic_2/pragmatic/accountApp/templates/accountAtpp/hello_world.html
{% extends "base.html" %}
{% block content %}
<div style="border-radius: 1rem; margin: 2rem; text-align: center">
<h1 style="font-family: 'Black Han Sans', sans-serif;">
Hello World LIST~!
</h1>
<form action="/account/hello_world/" method="post">
{% csrf_token %}
<div>
<input type="text" name="hello_world_input">
</div>
<div>
<input type="submit" class="btn btn-primary" value="POST">
</div>
</form>
{% if hello_world_output %}
<h1>
{{ hello_world_output.text }}
</h1>
{% endif %}
</div>
{% endblock %}
HTML
복사
2) pragmatic_2/pragmatic/accountApp/views.py
# HttpResponseRedirect를 import 한다.
from django.http import HttpResponseRedirect
def hello_world(request):
if request.method == "POST":
# if와 else의 render 부분을 아래와 같이 변경한다.
hello_world_list = HelloWorld.objects.all()
return HttpResponseRedirect(reverse('accountApp:hello_world'))
else:
hello_world_list = HelloWorld.objects.all()
return render(request, 'accountApp/hello_world.html', context={'hello_world_list': hello_world_list})
Python
복사
18강. DB 정보 접근 및 장고 템플릿 내 for loop
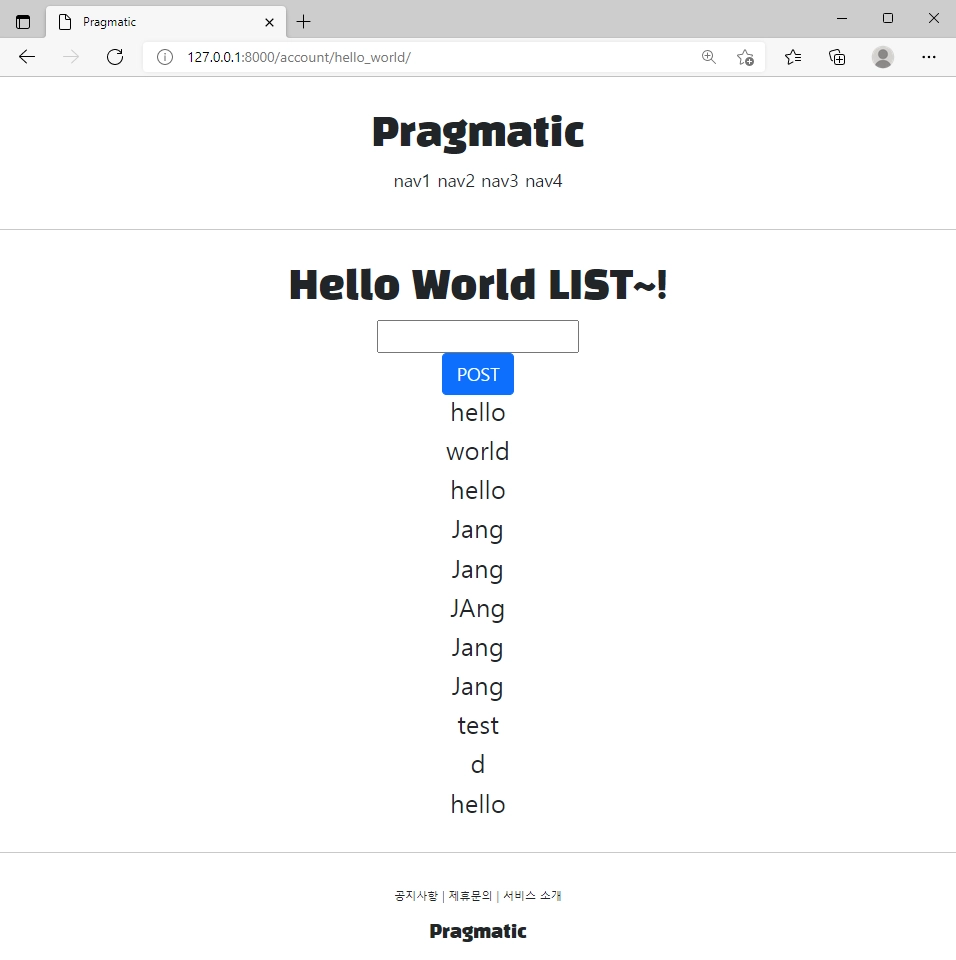
학습 목표 : DB에 저장된 정보들을 접근하고, 해당 정보들을 장고 템플릿 내에서 for문을 통해 출력하는 방법을 배운다.
1) pragmatic_2/pragmatic/accountApp/templates/accountAtpp/hello_world.html
</form>
<!-- form 태그 하단 부분을 아래와 같이 변경한다. -->
{% if hello_world_list %}
{% for hello_world in hello_world_list %}
<h4>
{{ hello_world.text }}
</h4>
{% endfor %}
{% endif %}
</div>
{% endblock %}
HTML
복사
2) pragmatic_2/pragmatic/accountApp/views.py
# HttpResponseRedirect를 import 한다.
from django.http import HttpResponseRedirect
def hello_world(request):
if request.method == "POST":
# if와 else의 render 부분을 아래와 같이 변경한다.
hello_world_list = HelloWorld.objects.all()
return HttpResponseRedirect(reverse('accountApp:hello_world'))
else:
hello_world_list = HelloWorld.objects.all()
return render(request, 'accountApp/hello_world.html', context={'hello_world_list': hello_world_list})
Python
복사
19강. Pycharm 디버깅 설정
학습 목표 : Pycharm Community edition 내에서 장고 디버깅을 위한 환경 설정을 진행한다.
step 1.
상단의 RUN > Edit Configurations 클릭 한다.
step 2.
templates > Python > Script path에는 프로젝트명/venv/Script 선택 하고 > Parameters에는 runserver 기입 한다. > Apply > OK
step 3.
manage.py 우 클릭 한 후 > Debug manage 클릭 한다.
20강. Django의 CRUD, Class Based View 소개
학습 목표 : CRUD를 짚어본다. CRUD를 구현할 때, 왜 Class Based View를 써야 하는지, 장고가 제공하는 Class Based View에 대해서 알아본다.
django는 CRUD로 유명하다!
•
CRUD : Create / Read / Update / Delete → Views
•
네 가지 작업을 쉽게 할 수 있는 클래스를 제공한다.
•
이를 Class Based View라고 한다. ( Function Based View)
Function Based View)•
생산성, 가독성 증가하고 복잡성, 시간 소비는 감소한다.
Account App 적용
•
Sign up → Create view
•
view info → Read view
•
change info → Update view
•
quit → Delete view